


Lots of people ask me how to draw realistic fur, and if you’re one of them, I promise it’s not nearly as difficult as it may seem. To make animal fur look real, build up the light and dark areas slowly, in layers, and save the fine individual hairs for the very end. The dark areas are where the fur sits in shadow, and the light areas are where the light shines straight onto it.
I’m Bonny Snowdon, and I’ve taught and mentored thousands of people around the world to draw realistically with coloured pencils. When I draw fur, I start by lightly sketching the direction it flows. Then I work on one small section at a time, putting the darkest areas in early. Once the colour is down, I use a pen eraser and a small craft knife to gently bring back the lighter hairs.
I’ll take you through each step using the long fur on an ear from one of my video tutorials, and if your animal has curly fur, my guide to drawing curly black fur goes through the curls in detail.
Along the way, I’ll show you why fur sometimes ends up looking like strands of spaghetti or string, and how to avoid it. And if your drawing looks a bit strange or ugly while you’re still putting the first colours down, please don’t worry! You’ve got to keep your wits about you at this stage, because the detail comes later.
Here’s that video if you’d like to watch first. It’s about six minutes long and covers around three hours of drawing.
What you need to draw realistic fur
To draw realistic fur the way I do in this guide, you’ll need a reference photo, drafting film, coloured pencils, a pen eraser, a small craft knife and a soft brush.
I drew the ear in the video on drafting film. It’s a sheet that needs fewer layers than paper, and you can get to the fine hairs really quickly. If you love detail, it’s a fantastic surface to work on. Your pencils don’t need to match mine exactly, and a close match will work.
- A reference photo. A clear photo of the animal you’d like to draw, to work from as you go.
- Drafting film. A thin sheet of matt plastic film made for drawing on. It’s semi-transparent, which comes in handy in Step 1.
- Faber-Castell Polychromos and Caran d’Ache Luminance coloured pencils. I used oranges, browns, pinks and reds for this fur, with a very pale, warm Luminance for the first rough sketch. For the darkest parts, Polychromos Dark Sepia is one of my go-to pencils, and Walnut Brown works beautifully alongside it.
- A Tombow Mono Zero pen eraser with a 2.3mm round tip. Its tiny tip reaches very small areas. I use it with the lightest pressure I can to bring soft highlights back into the fur.
- A Slice manual pen cutter. A small craft knife with a ceramic blade, which I use to bring out fine, light hairs and texture. It’s quite gentle, if you can call a blade gentle, and it won’t damage drafting film.
- A soft brush, like a blusher brush. For sweeping away the loose pigment after you’ve erased or scratched into the fur. A brush is safe on drafting film and hot pressed paper (a smooth paper), but never use one on Pastelmat, because it will smudge your pigment everywhere.
You’ll find more about the pencils and surfaces I use in my materials guide. If you’d like to go deeper on drafting film, I’ve written about creating textured fur on drafting film.
How to draw fur step-by-step
Step 1. Sketch the fur and the way it grows
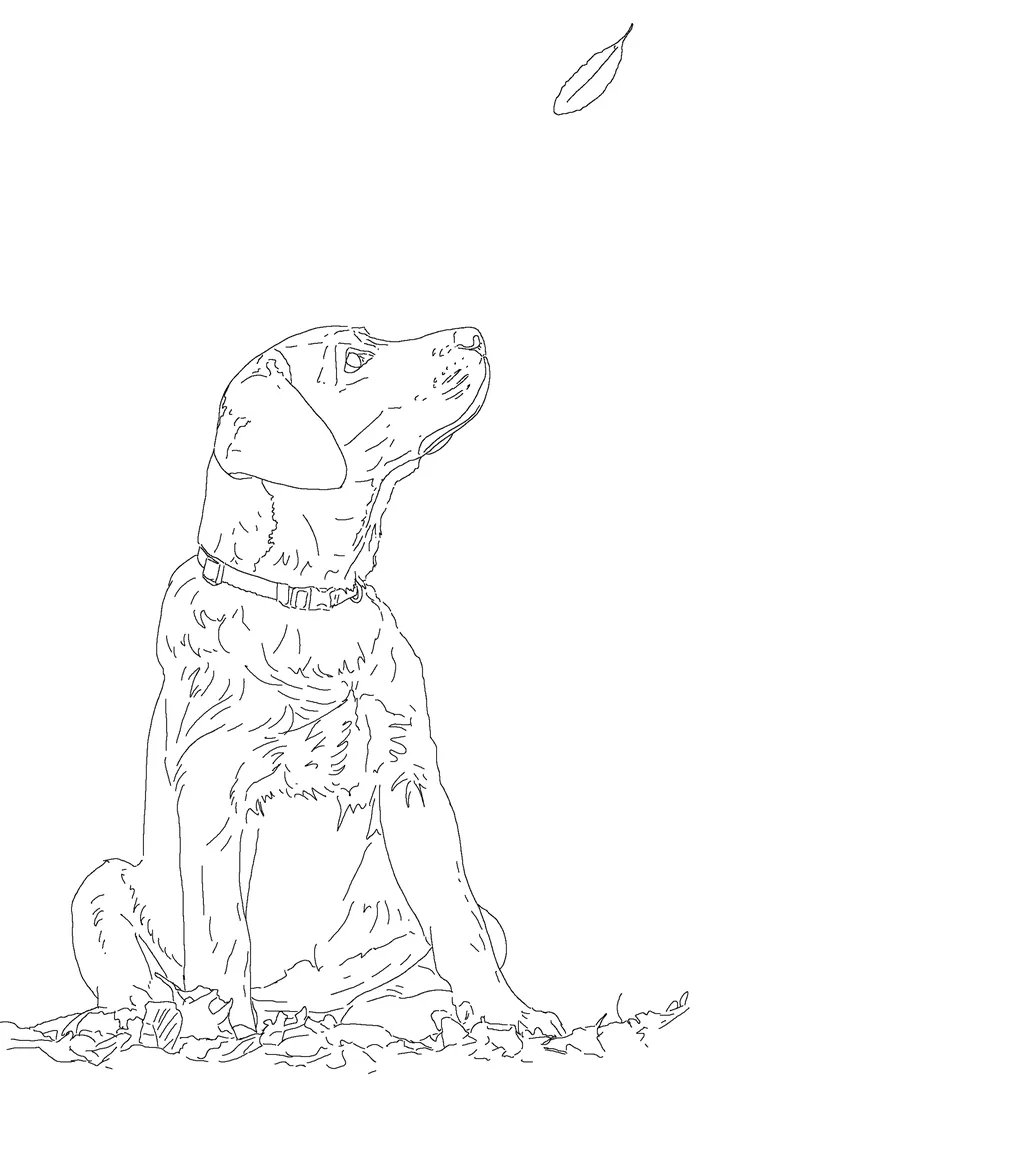
We’ll start with a rough sketch of the fur. You don’t need to copy your reference photo (the photo you’re drawing from) perfectly, and it’s completely fine if your sketch looks nothing like a finished drawing yet. All you’re after at this stage is the look and feel of the fur.
- If you have a line drawing of your animal, slip it underneath your drafting film. You’ll see the lines through the film, and you won’t need to rub anything out later.
- Take the pale, warm Luminance from the materials list.
- Pressing very gently, sketch in where the curls and waves of the fur go, following the direction the fur grows.
- Look for the bigger shapes and clumps of fur, and leave the individual hairs until much later.
- Notice where the fur falls into separate sections. In the next step, you’ll work on one section at a time.
Keep your lines loose. They’re only there to give you an idea of where the fur is going.
Step 2. Colour the fur one section at a time
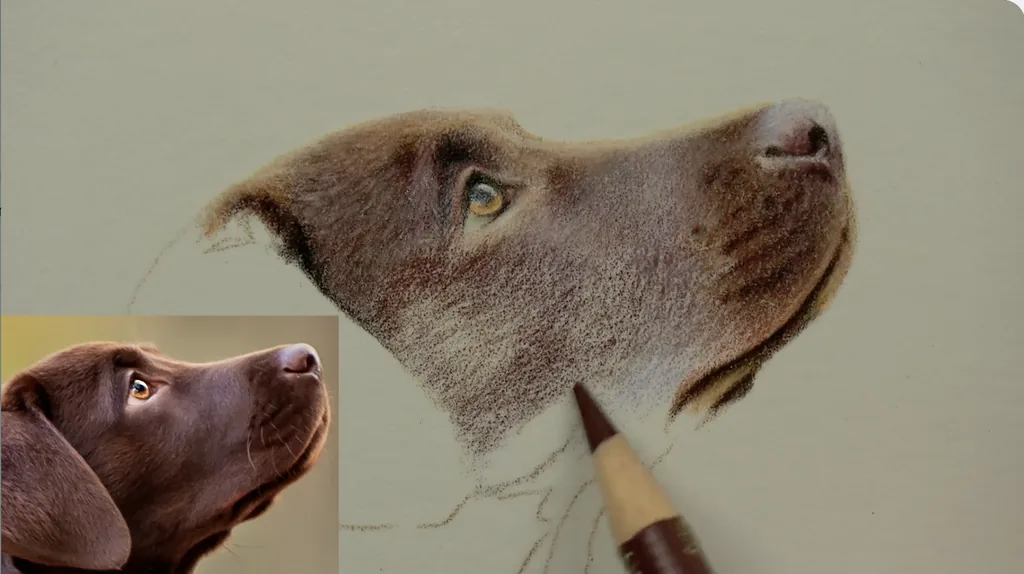
If you look at all that fur in your reference photo and feel a bit overwhelmed, I completely understand. It’s very easy to get lost in all those individual hairs. I like to work on fur in little sections, and that’s what we’ll do here.
- Choose a little section near the top of your sketch. On my drawing, I started at the very top of the ear.
- Begin adding colour to that section, following the lines from Step 1 and matching the colours you can see in your photo.
- Put the darkest parts in straight away, too. I’ll explain why in the next step.
- Start to shape the clumps of fur while you’re colouring.
- Once that section has a bit of colour in it, move down to the next one and keep going.
The fine hairs can wait. We’ll come back up to the top for those later on.
Step 3. Add the darkest parts of the fur early
To make fur look realistic, colour in the darkest parts early, while you’re still working through each section. I know it can feel a bit scary to go dark this soon, but it’s really important. The light parts of your fur will only look light when there’s something dark beside them.
Have a look at your reference photo and find where the fur is darkest. These are the shadows, where the fur sits deep down. Colour those areas in with your darker pencils, like the Dark Sepia and Walnut Brown from the materials list. You can see me do this in the video, bringing the darks in very quickly as I work my way down the ear.
At this point, your drawing will probably look a bit odd, with patches of light and dark and hardly any fur showing yet. Don’t panic! It happens to everyone, and it means you’re exactly where you should be. The fur starts to appear as the layers build up, and we’ll begin bringing it out in the next step.
Step 4. Find the bright and dark bits of the fur
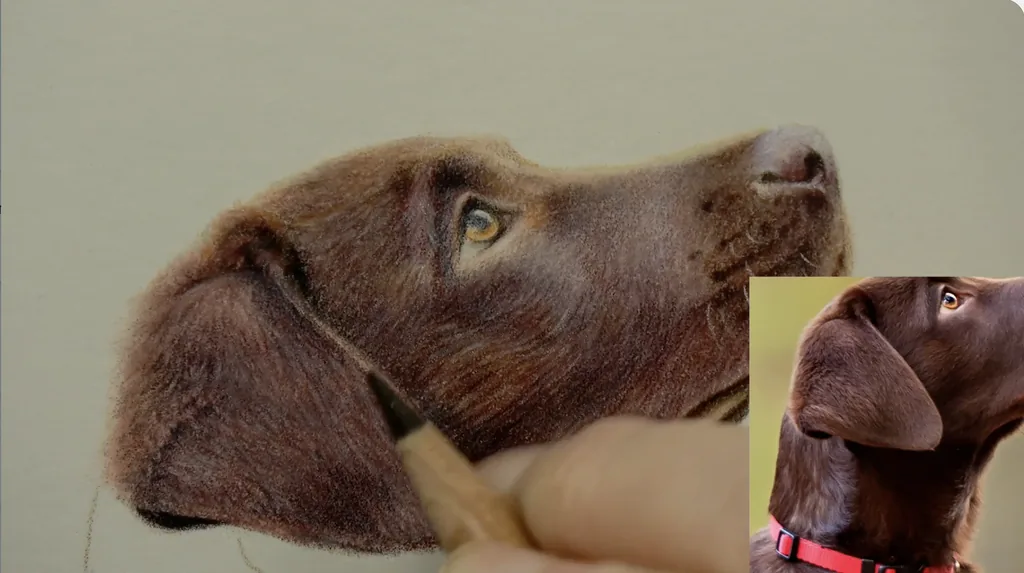
Now I’d love you to pop your pencils down for a moment and have a good look at your reference photo with me. Find the brightest, palest bits of fur. Can you see them? These are the places where the light is shining straight onto the fur, and we call them highlights.
Next, look at the darker bits around them. Fur is made of lots of hairs lying on top of each other, and the hairs underneath don’t get much light, which is why they look darker. These are your shadows, and you’ve already started on them in Step 3.
For me, getting the lights and darks right is incredibly important, because it’s what gives fur its shape. If you can’t spot them straight away, don’t worry. Take your time and keep looking.
Step 5. Bring out the highlights in the fur
To bring out the highlights in your fur, take a little colour back off the brightest bits with your pen eraser and craft knife. Start back at the top, where you began in Step 2.
I know it can feel strange to rub out colour you’ve only just put down. I like to see it as adding highlights, because you’re putting light back into your fur. Once you get your brain around that, it all feels a lot easier!
- Click a little of your pen eraser out, then rub it very lightly over one of the bright bits. Use the softest touch you can get away with, and you’ll see the colour lift.
- Do the same on the other bright bits in that section. Lovely soft highlights will start to appear.
- For the finest, palest hairs, slide the blade of your craft knife out and carefully scratch a few thin lines into the colour, following the direction the fur grows.
- Sweep away the bits of colour you’ve lifted with your soft brush.
- Move down to the next section and repeat. If any area needs to be a little darker, add a touch more pencil, then bring the highlights back out. Keep going until you reach the bottom.
If you take off a bit too much, it’s easily fixed. Add a little pencil back in and try again. Fur is built up exactly like this, adding colour and lifting it out, layer by layer.
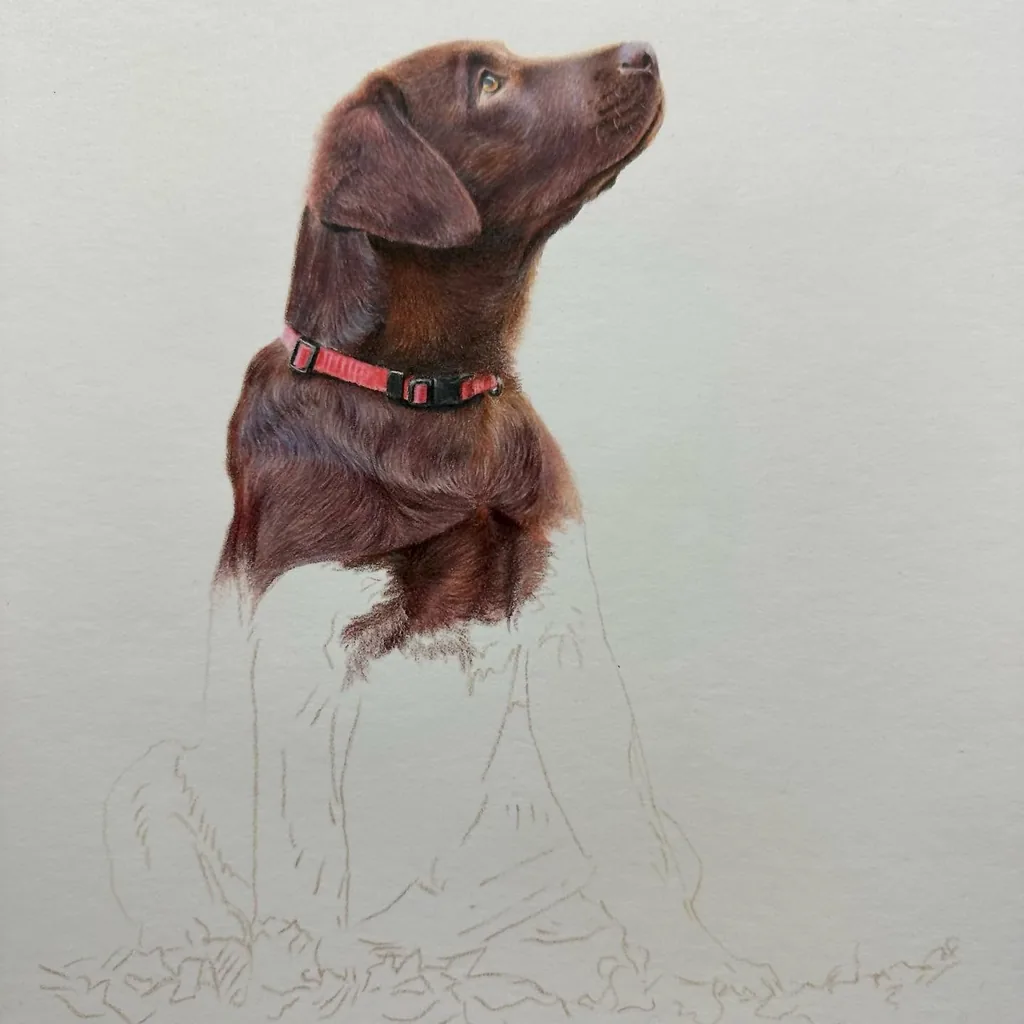
Step 6. Make the fur look soft and fluffy
To make your fur look soft and fluffy, finish with a few small tweaks until the light and dark blend softly into each other. There’s no rush here.
- Prop your drawing up and step back from it.
- Anywhere that looks a bit flat, add a little more shadow with your darker pencils.
- Anywhere that looks too dark or solid, bring out another highlight with your pen eraser.
- Look for any curls or waves you could make a little clearer, and add a touch of colour to bring them out.
Please try not to copy every single hair in your photo. It gets frustrating, and it takes an awfully long time. What you’re looking for is softness, and the feel of all that hair lying over the top of itself. When your fur looks soft to you, put your pencils down. And there you have it, realistic fur in coloured pencil!
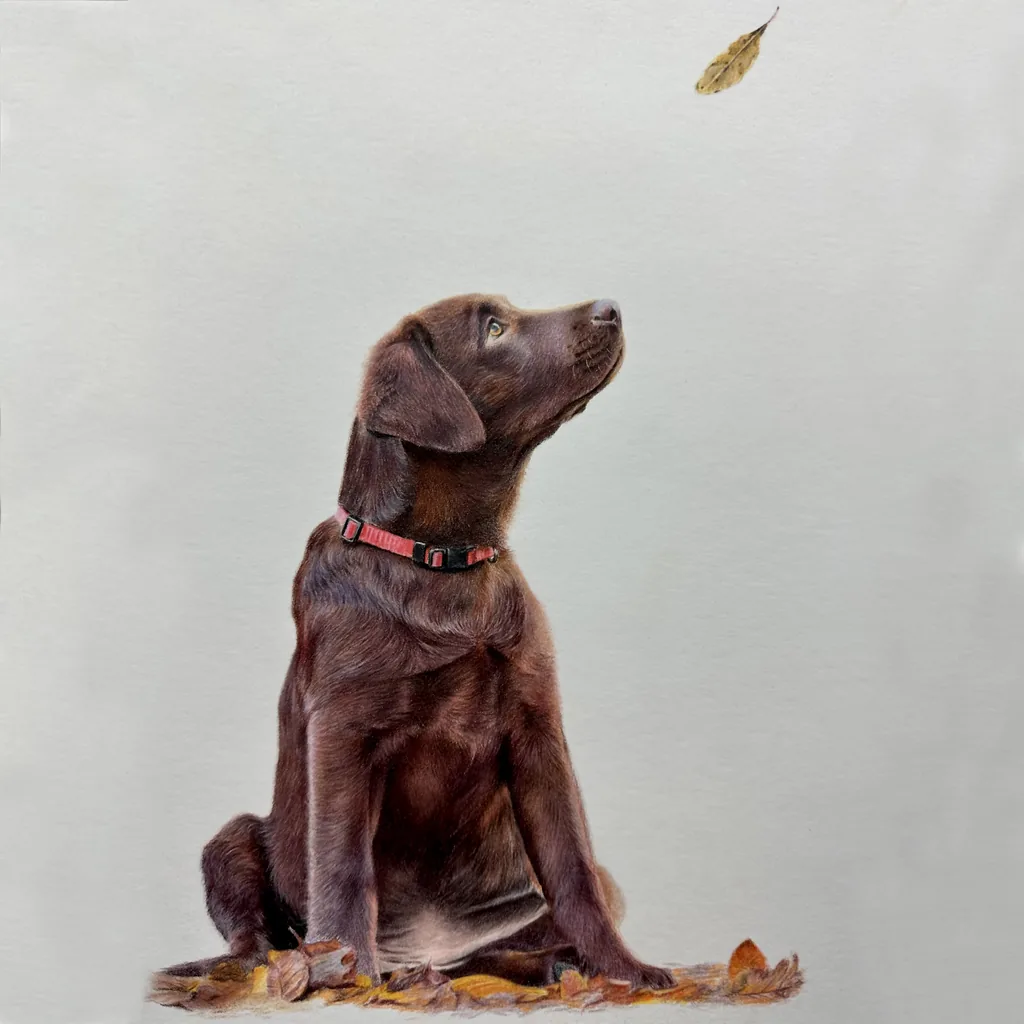
My tips for drawing realistic fur
Drawing fur can take a little while to get the hang of, and when it isn’t quite working, it’s very easy to decide you’ve done something wrong. Usually, you haven’t! Here’s what might be going on, and how to put it right.
- If your long fur looks like strands of spaghetti or string, it happens an awful lot, and it’s simple to fix. It’s usually because the clumps of hair have ended up with an outline around them. We’re often told to concentrate on the shapes in fur, and it’s tempting to concentrate a little too hard and draw a line around each one. I like to see every clump as its own little masterpiece, with its own light and dark parts. Let them run softly into each other, and you’ll end up with lots and lots of little masterpieces that look like soft, flowing fur.
- If your highlights aren’t showing up, the colour underneath probably isn’t dark enough yet. The lines from your craft knife only stand out against a nice, rich colour. Pop in a little more of your darker pencils, then bring the highlights back out, and they’ll show up beautifully.
- If you’re drawing very dark or very pale fur on paper or Pastelmat, choose a colour that gives you a head start. When I drew black curly fur, I chose dark grey Pastelmat, and for white fur, I’d reach for white paper.
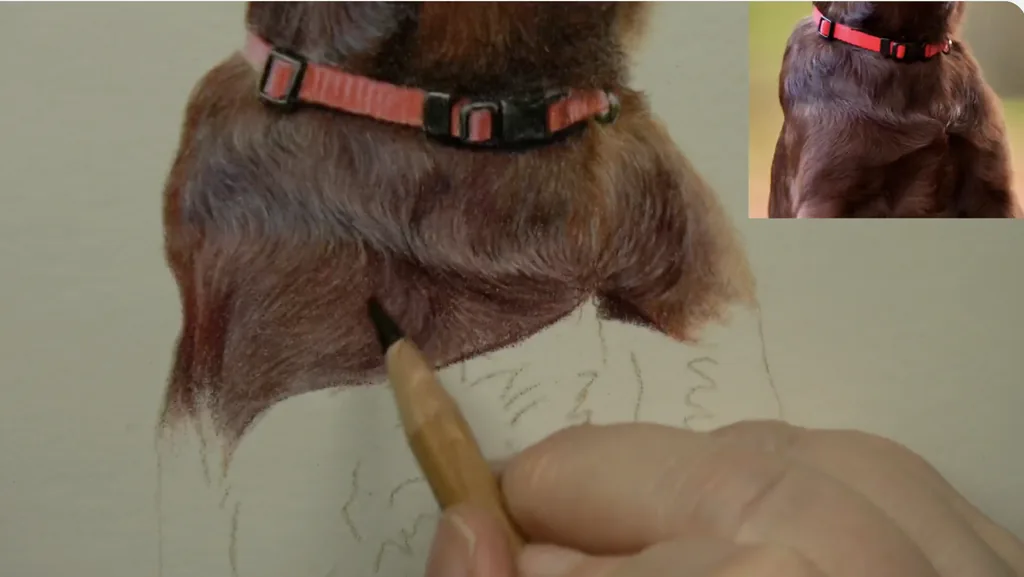
And if it’s a fox you’re drawing, my guide on how to draw a realistic fox takes you through the face and the fur, step by step.
Share your fur drawing with me
I’d love to see how your fur turns out! Come and share it in my free Facebook community, where you can ask me questions, get feedback on your drawing and see how other people have drawn theirs. Everyone there is learning too, and nobody will mind a few stray hairs.
If you’d like more coloured pencil tutorials after this one, you’ll find lots on my YouTube channel, and my free resources are a lovely place to start.
Comments +